This is the second post in a series about Azure DevOps. This one is about release pipelines; if you use Azure to build packages (like binaries, etc.), how do you push them to a final endpoint? In this example, we will be building a simple pure Python package, and pushing the result to Test-PyPI. You can adapt it to your situation, however. The third post will cover building Python binaries. This series was developed to update the testing and releasing of Python packages for Scikit-HEP. Several of the projects in SciKit-HEP are using release pipelines, include boost-histogram and Particle.
Note: I now highly recommend GitHub Actions, which is almost “Azure 2.0”. You can read my tutorials on GitHub Actions on the Scikit-HEP developer pages. The release process, in particular, is simpler, and you still get the benefit of artifacts.
TL;DR (click here)
| Name | Command |
|---|---|
| Install Twine | python -m pip install twine |
| Show files | ls *scikit-hep.$(System.TeamProject)/wheel_*/* |
| Twine authenticate (task) | username: __token__, password is PyPI token |
| Upload files | twine upload -r test_pypi --config-file $(PYPIRC_PATH) *scikit-hep.$(System.TeamProject)/wheel_*/* |
Build Pipelines
Producing the files
The first thing you need to do is make sure your build pipeline is producing files that you want to release; these are called artifacts. Somewhere in your build pipeline you should have something that looks like this:
steps:
  - task: PublishPipelineArtifact@0
    inputs:
      artifactName: "unique_name"
      targetPath: "dist"
There should be a unique name for each publish you do; you can use variables
like $(Agent.OS) and $(Agent.JobName) to build a name here that keeps one
job from clashing with another. Remember the name you use; this name is part of
the path to your artifact.
You can download any published artifact as soon as they are produced by using the menu in the upper right hand side of the page. You can do this while the rest of the job is finishing, or after a build is complete (as long as you do it within a few days and not too many other jobs have run). This is great for testing binaries in development or just before a release.
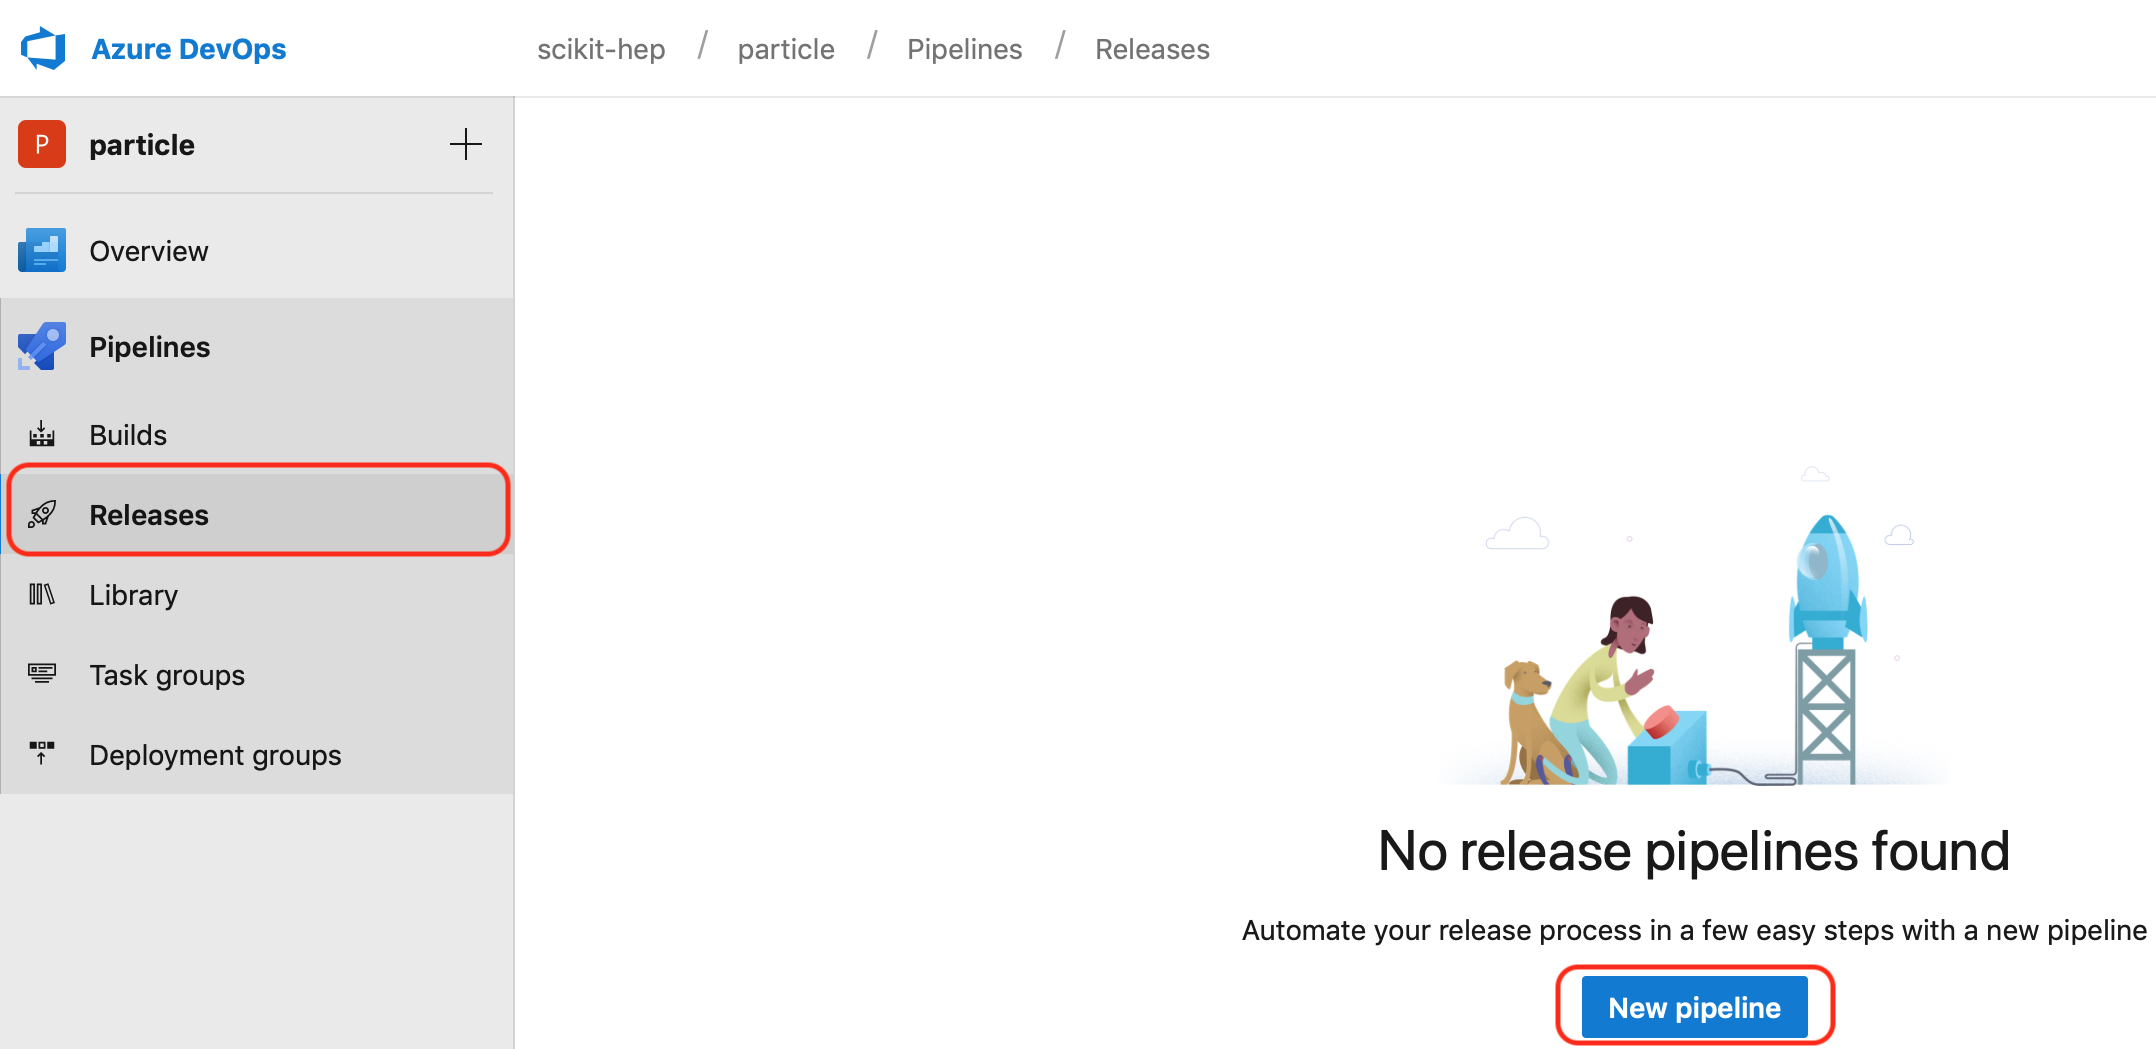
Release Pipelines
Setting up a new pipeline
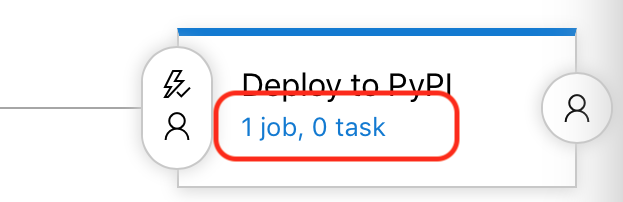
Release pipelines live just under build pipelines in the Azure UI. Start by making a new Pipeline.
There are templates, but for our tutorial, we will set everything up ourselves. You will want to start by making an empty job.
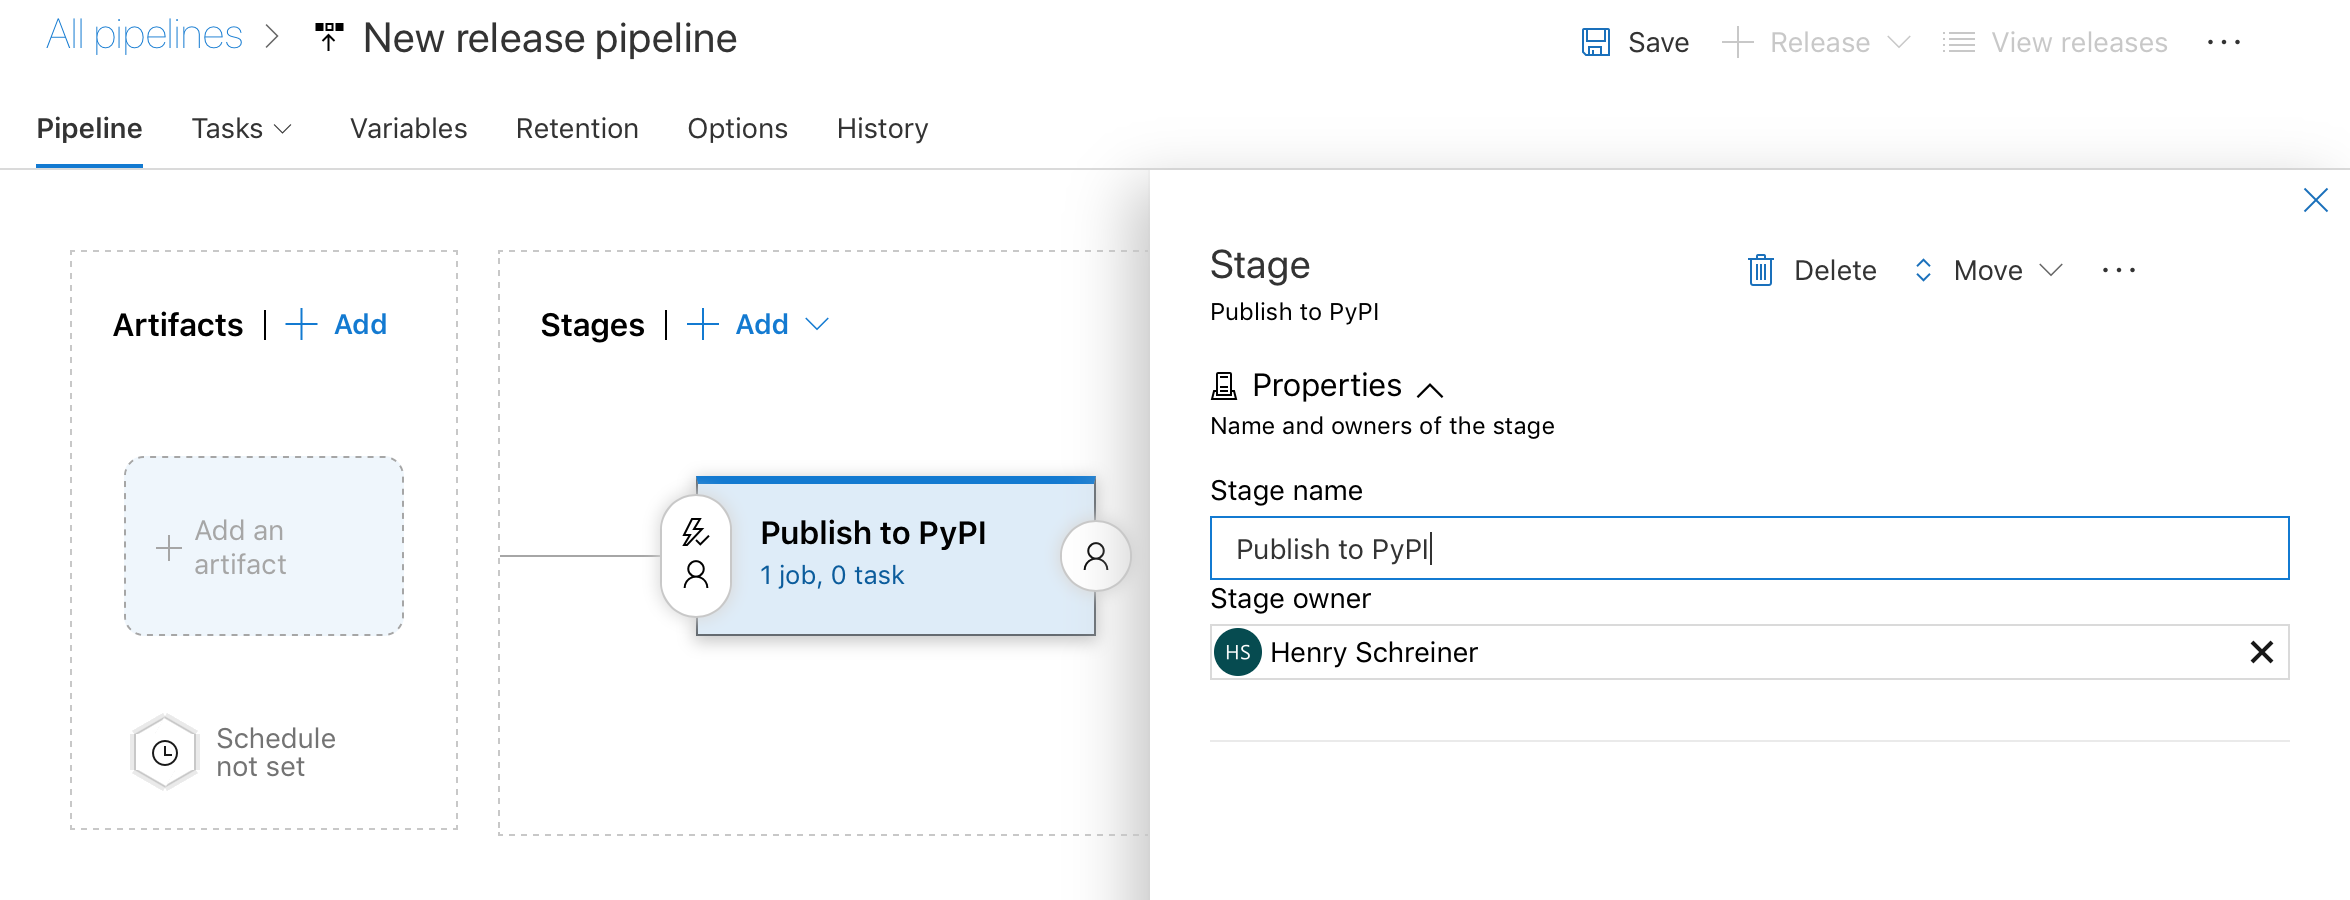
Stage properties
Azure will place us in the stage setup. Just add a name here. We will be setting
up a release pipeline to deploy to PyPI, so “Publish to PyPI” or “Deploy to
PyPI” might be good names. There’s really nothing else interesting in the stage
setup. Press the x in the upper righthand corner when you are done.
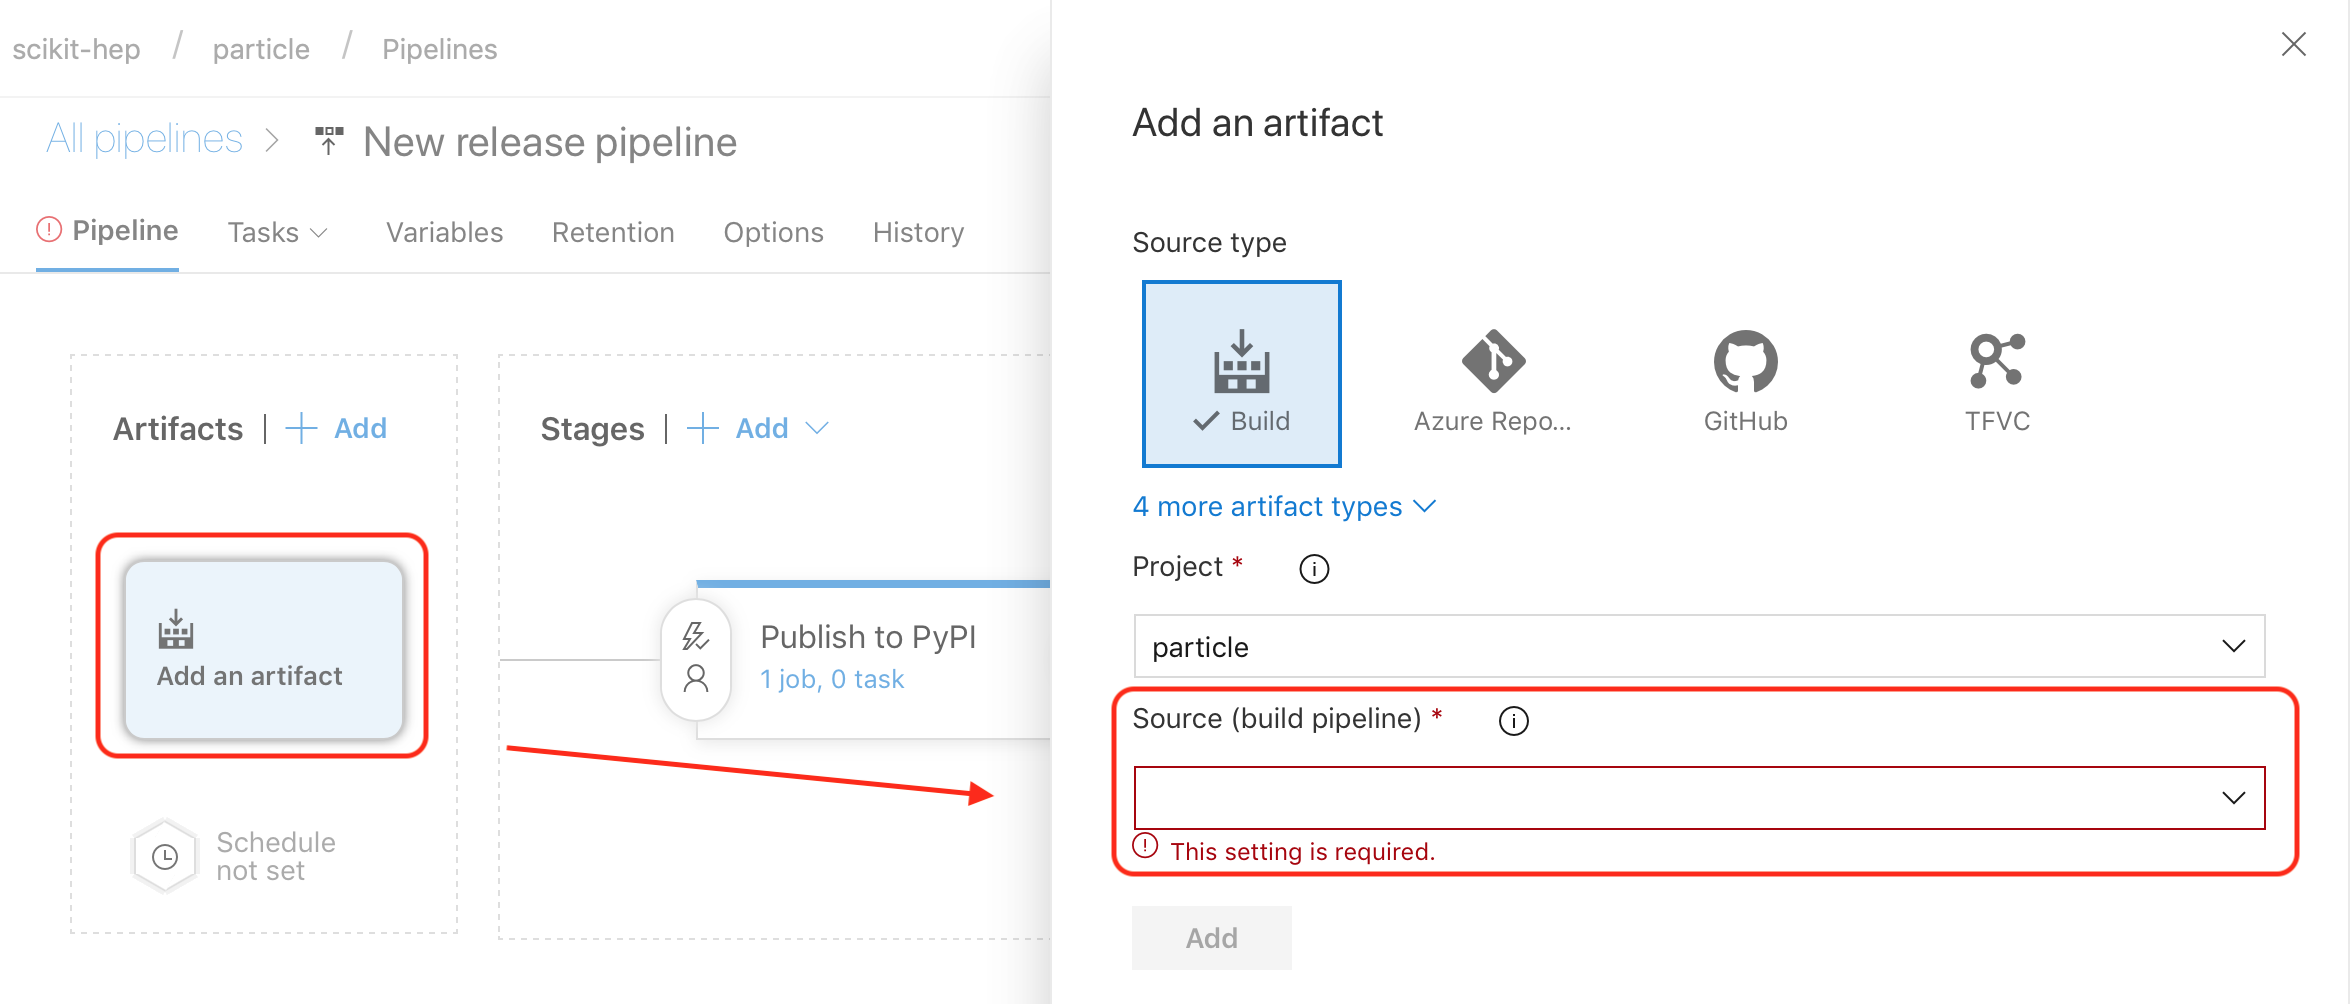
Artifacts
Next, let’s click on “Add an artifact” on the left hand side of the screen. Select the artifact you want to use.
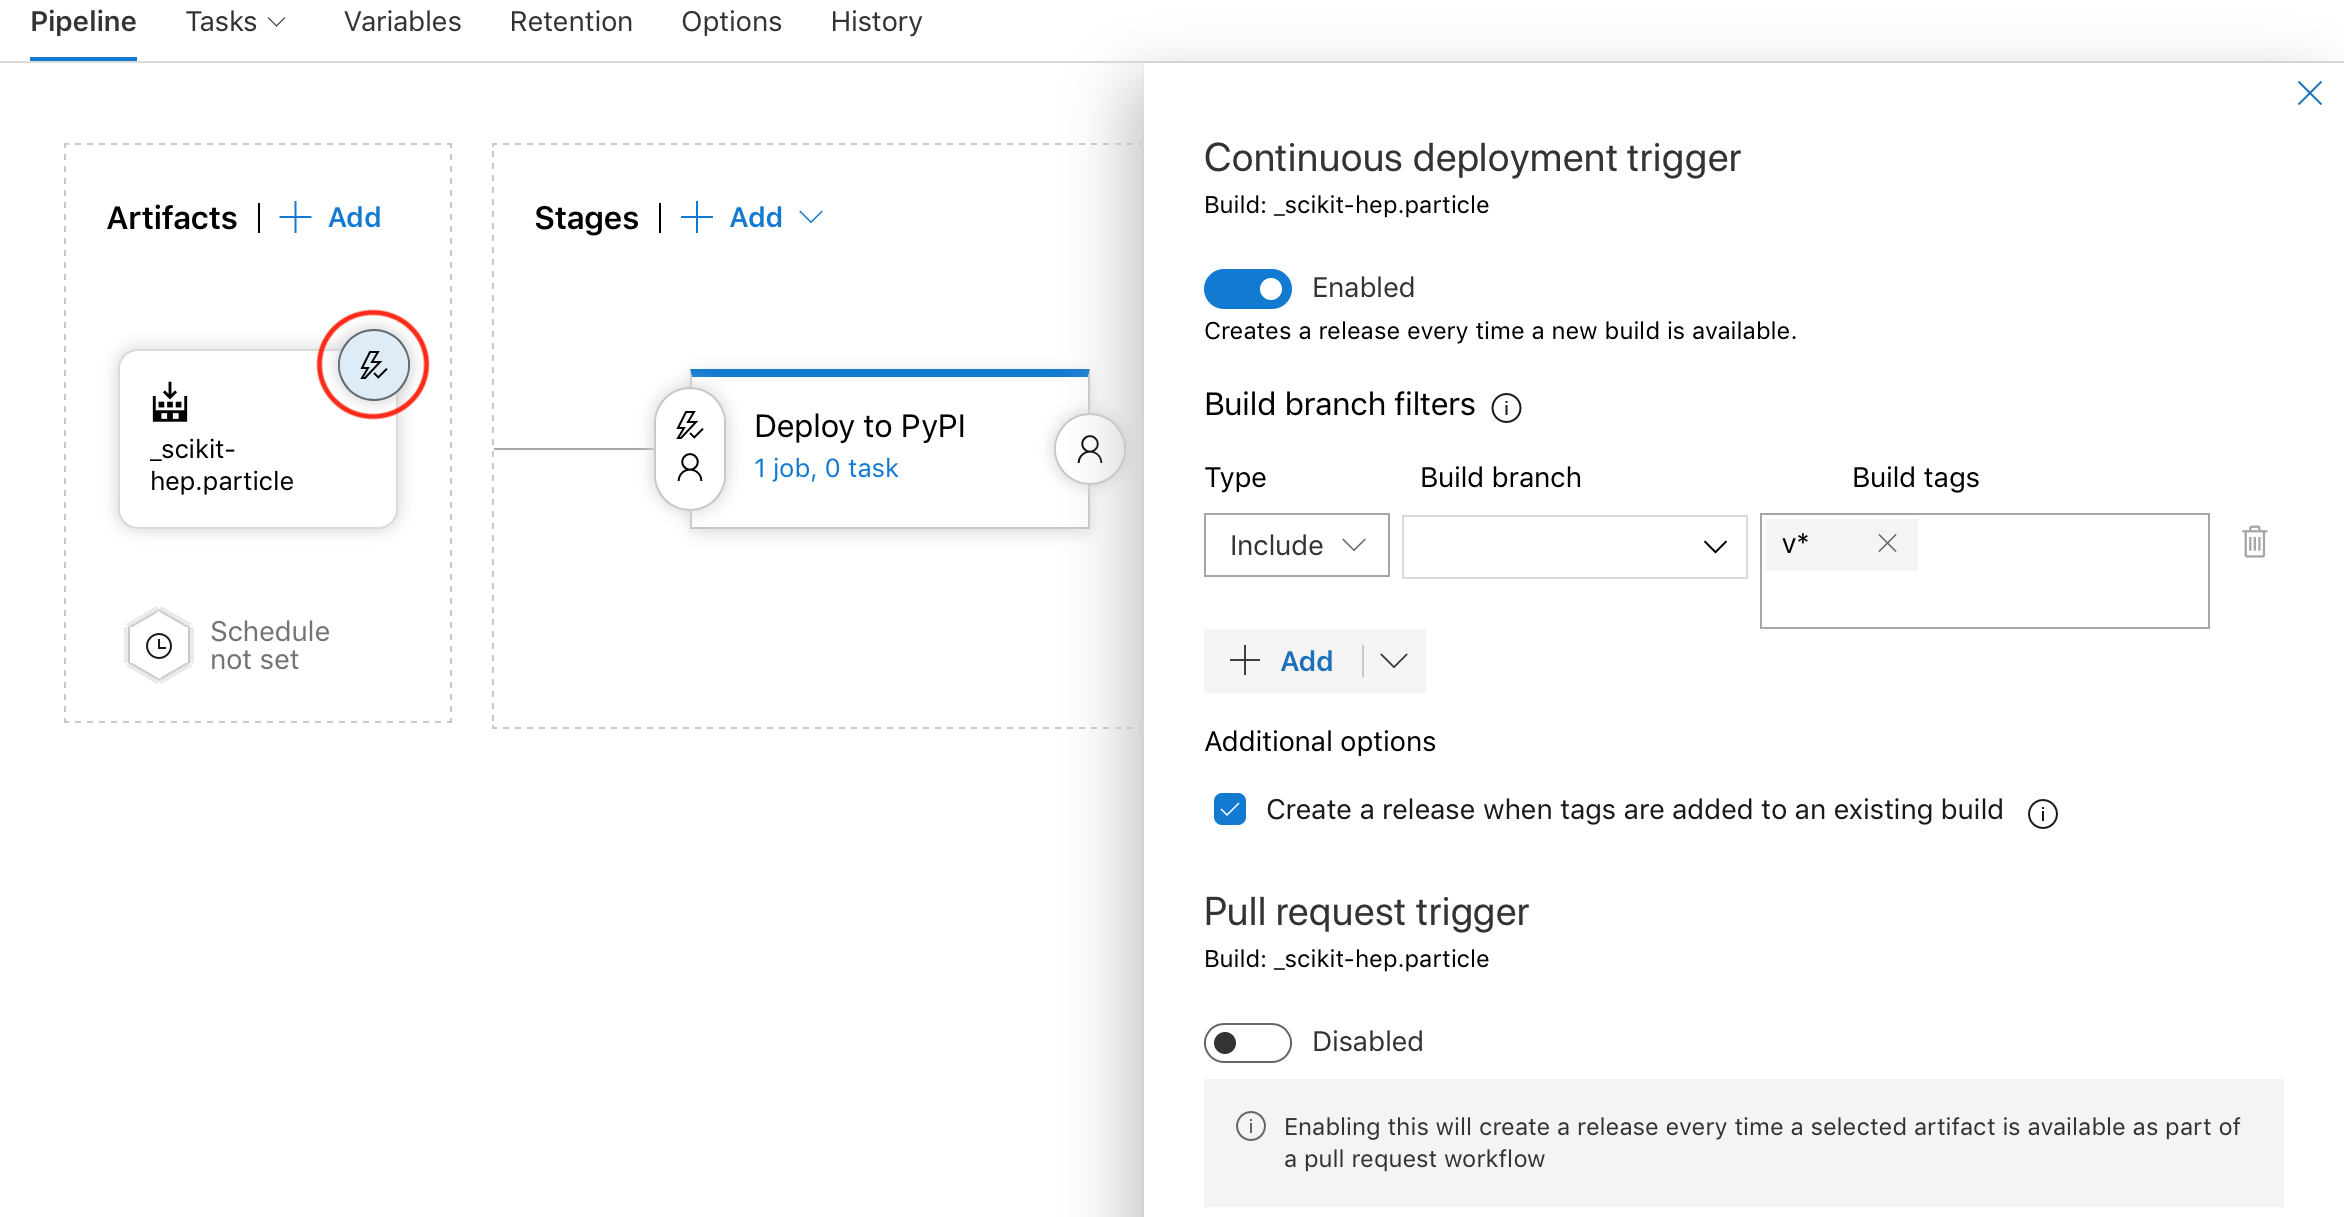
Triggers
Now, click on the small circular trigger icon on the upper righthand side of the artifact; it looks like a lightning bolt. This is where you can setup automatic releases; you can trigger on branches, tags, and more. Set this up to however you want to release; if you leave it blank, you can still do manually triggered releases (which you might prefer).
Tasks
Next, we need to start adding tasks - these have the same meaning and setup as in the Build Pipelines. To get there, though, you have to click the small blue words inside the stage box. I didn’t find this as obvious as a clear button would have been.
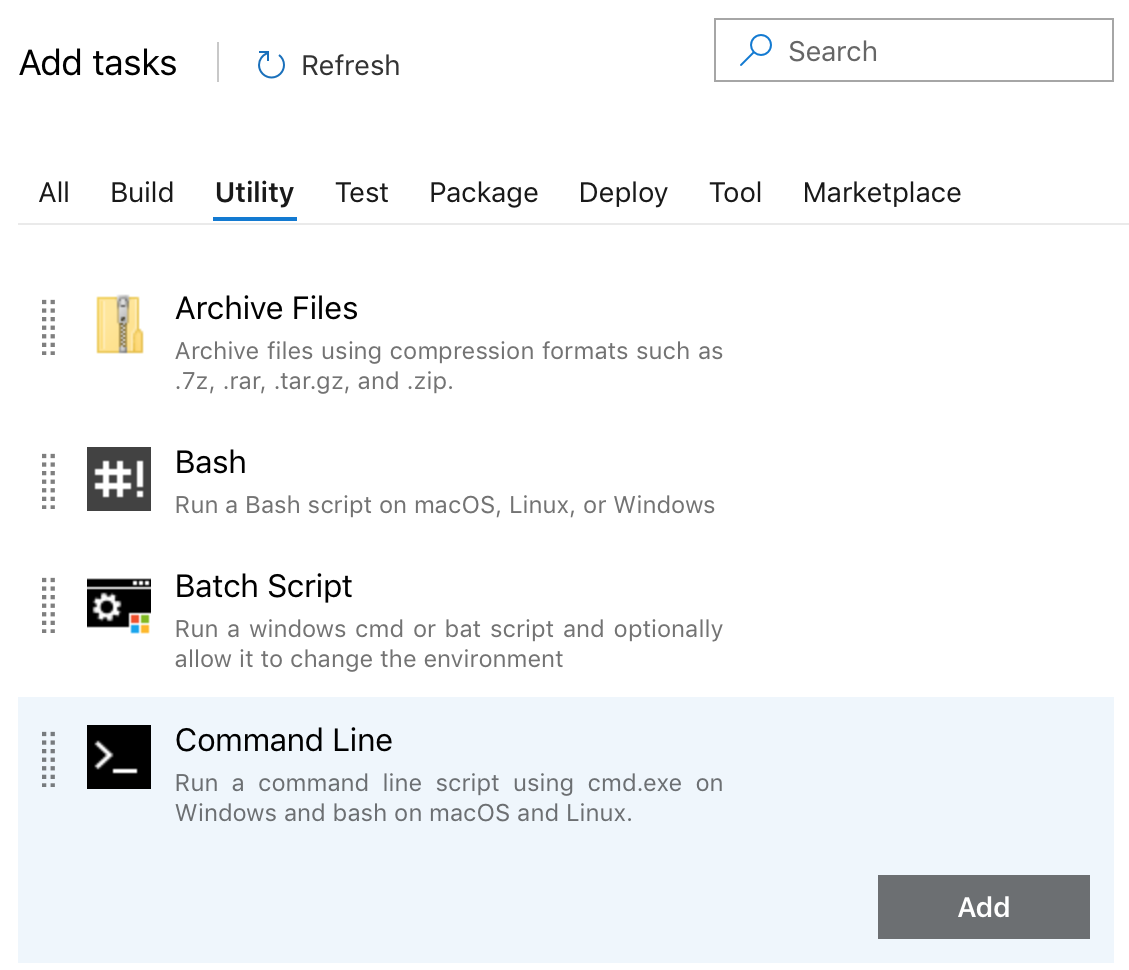
Now, you’ll be presented with the “Add tasks” screen. You probably have used YAML to do this in Build Pipelines, but if you did use the GUI, it should look familiar. The tasks you add will depend on what you want to do with your files; we’ll be publishing Python packages to PyPI.
For our purposes, we want four tasks:
- Install Twine (the Python library for pushing files to PyPI)
- List the files we will upload (for our records and our sanity)
- Make an authentication file for Twine (special Azure task)
- Upload with Twine
Note that step 3 is a special one that uses “Azure endpoints”, which we will cover in a moment. You could also just use secret variables and do the push yourself, but this is more elegant and secure if your endpoint is supported.
You’ll need to add the tasks. “Command Line” is under “Utility”, and we’ll add it three times, for steps 1, 2, and 4.
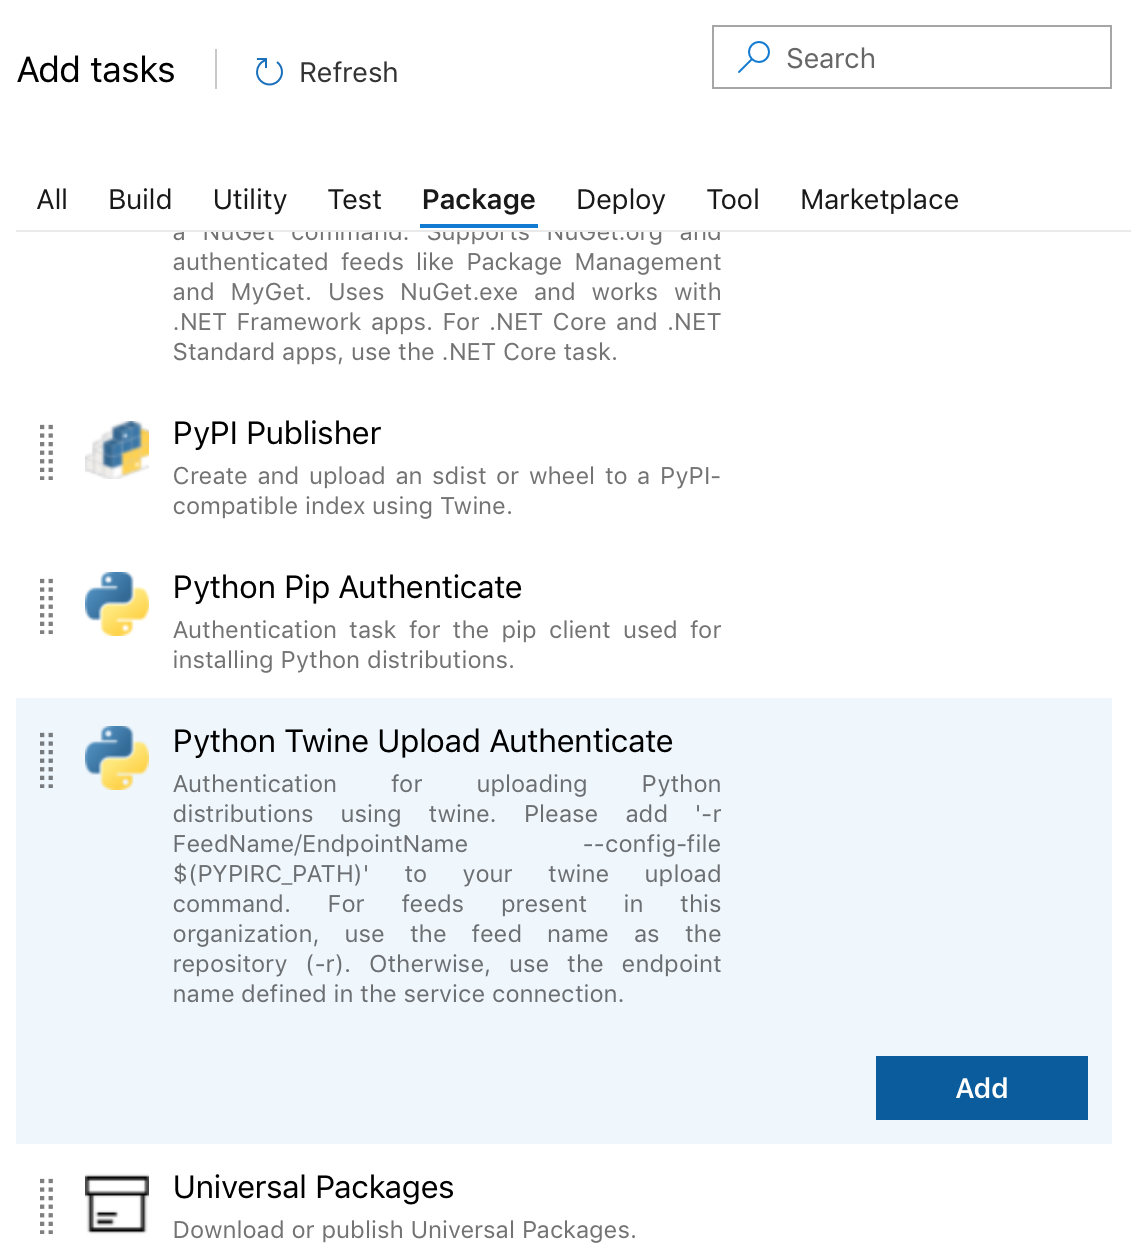
You’ll find Twine Authenticate under “Package”.
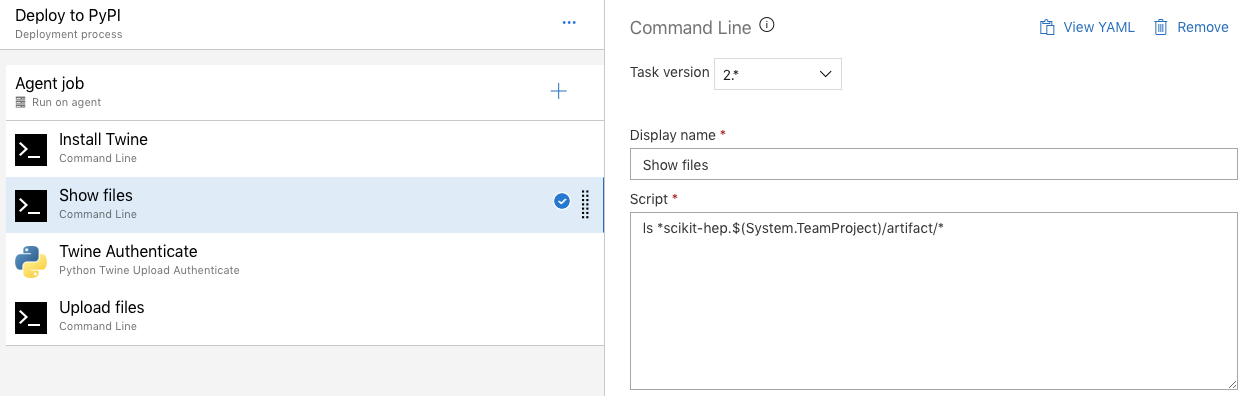
For each command line task, you will need to set the “Display name” and the Script. If you feel lost, at the top right of the screen, when a task is selected, you can click “View YAML” to see what it would look like if it was not in a GUI.
Here are the commands for each task:
Install Twine
The default Python version on the nodes is fine, so all we need is:
python -m pip install twine

Show files
You’ll want to list your artifacts. This will depend quite a bit on your setup; for my packages, it looks something like this:
ls *scikit-hep.$(System.TeamProject)/wheel_*/*
The full path is <org name>.<project name>/<artifact name>/<files>, where the
organization name might have an underscore. If you have published more than one
artifact from your build pipelines, you can use something with a * in it to
pick up all your files; just don’t try to send your test or coverage results to
PyPI! In the above command, I am assuming artifacts that contain wheels (or the
sdist) start with the name wheel_.
Twine Authenticate
For maximum security, you should visit your project’s page on PyPI, click “Manage project”, “Settings”, followed by “Create token for project”. You should give it a name like “Azure project”, and select just this project as the upload scope. You will get just one chance to download the token (like most token systems); if you forget it, you will need to generate it again. This way, if someone does manage to get the “password” (token), they will only be able to upload packages to one project, rather than change all settings on all projects.
In order to authenticate, you need to have at least one external feed. You can click “Manage” or “+ New” to add more feeds. If you do click manage instead of new, you’ll need to select “New service connection”, followed by “Python package upload”.
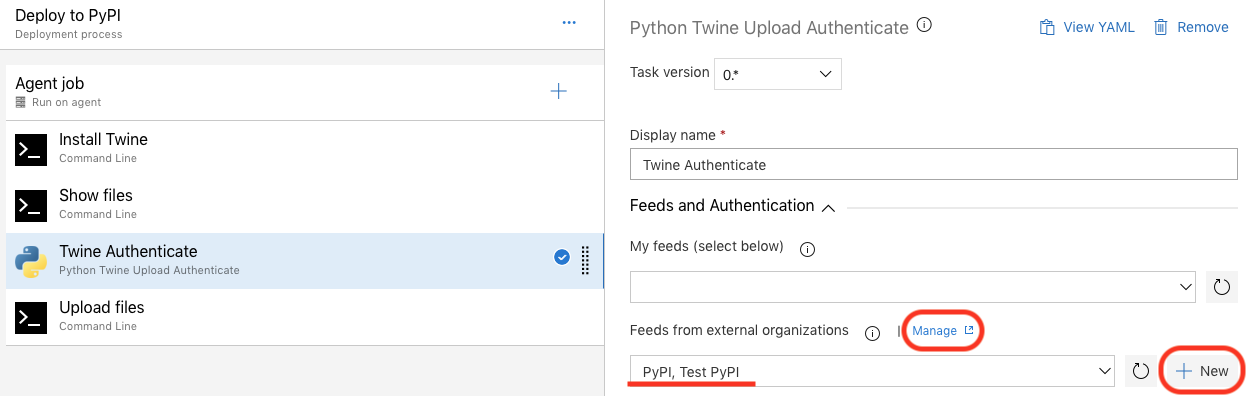
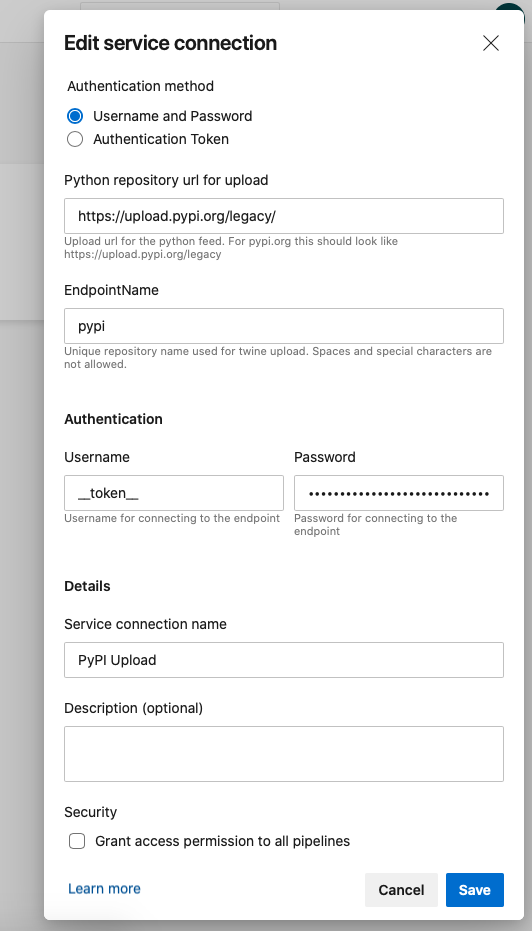
In the new external feed screen, you should give your feed a nice human-readable
name. You should add a URL; it must have the ending slash! Otherwise Twine
will fail because it thinks it is being redirected. You should use
https://test.pypi.org/legacy/ for Test-PyPI and
https://upload.pypi.org/legacy/ for the real PyPI. You will need an endpoint
name; this is an identifier that you will use with Twine as
twine upload -r <endpoint name> in the next step. The username should be
__token__ for token (the built-in option “Authentication token” is not for
PyPI tokens).
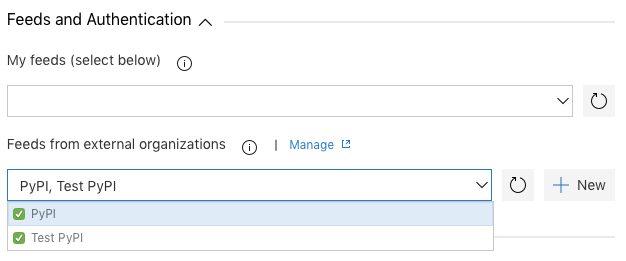
You’ll want to make sure you have at least one feed selected. Any feed that is
selected will write itself to a Twine config file called $(PYPIRC_PATH).
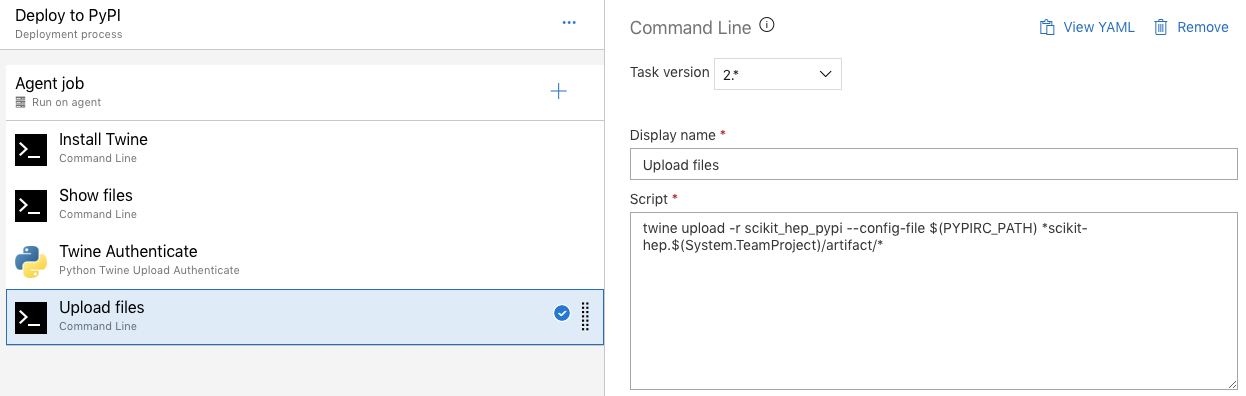
Upload files
This is the final command line script; for Twine it looks like:
twine upload -r test_pypi --config-file $(PYPIRC_PATH) *scikit-hep.$(System.TeamProject)/wheel_*/*
You select the endpoint name here, as -r <endpoint name>, and you need to use
--config-file $(PYPIRC_PATH) to pick up the file that the Twine Authenticate
task makes (this file defines the endpoints that -r picks up). The final path
here should match the one in your “Show files” task.
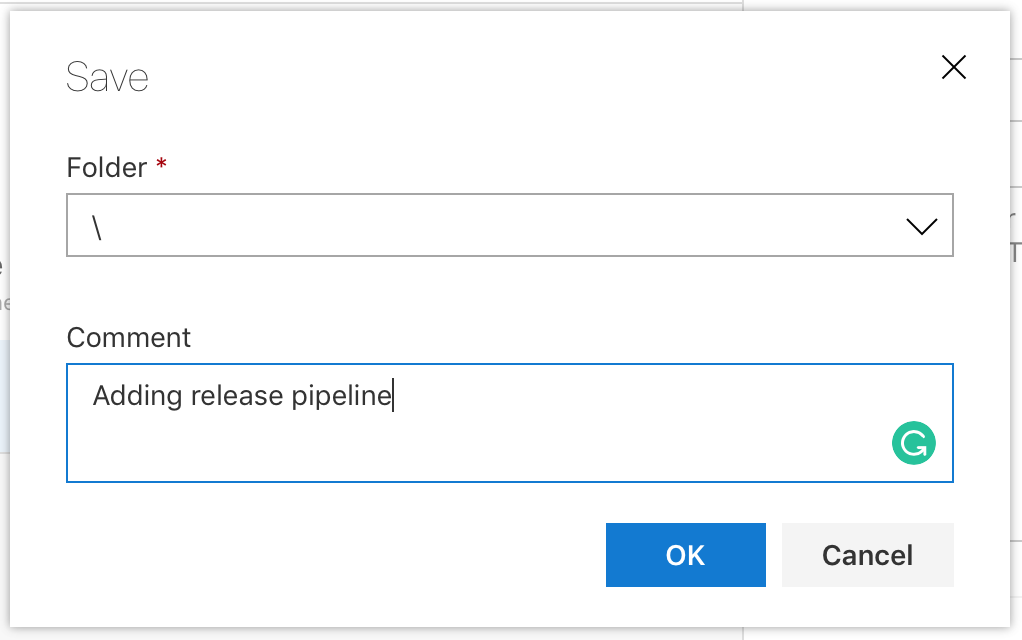
Saving the pipeline
When you click save, you’ll be asked to provide a comment. The first time you
save, you’ll also be asked for a folder to save the pipeline to. Just / is
fine for now.
Making a manual release
When you are ready, just click “Create release” in the release pipelines window. Leave all defaults alone, and start it up! Just like a Build Pipeline, you can monitor the status of the job and tasks.

Wrap up
With that, we have now covered how to make a Release Pipeline in the context of making Python packages. You can see a simple example of a build pipeline that uses these release pipelines in the Particle package. I will next cover making Python wheels, including all the tricky bits for Linux, macOS, and Windows.
If you have suggestions or corrections, either let me know in the comments below, or open an issue here, since this is an open source blog. I would like to thank Eduardo Rodrigues, who helped me edit these posts before they were published.