Continuous Integration (CI) is fantastic for software development and deployment. One of the newest entries into the CI market1 is Microsoft’s Azure DevOps. Their Open Source support is impressive; it is likely part of the recent push2 by Microsoft to be more Open Source friendly. Open Source projects get 10 parallel builds, unlimited build minutes, 6 hour job timeouts, and incredibly fast jobs on macOS, Linux, and Windows, all via a single platform. Quite a few major projects3 have been moving to Azure since the initial release in December 2018. The configuration of DevOps is second only to GitLab CI in ease of use and possibly the most expressive system available. The multiple pipeline support also scales well to complicated procedures.
This is the first in a series of posts covering an introduction to setting up projects in Azure DevOps, developed to update the testing and releasing of Python packages for Scikit-HEP, a project for a coherent High Energy Physics Python analysis toolset. The second post covers release pipelines, and the third covers building binary Python packages using DevOps.
Note: I now highly recommend GitHub Actions, which is almost “Azure 2.0”, if you are interested in setting up CI. The language is very similar, although simplified, with some non-backward compatible bugfixes (such as multiline expressions will error if any line files, instead of just on the last line in Azure). You can read my tutorials on GitHub Actions on the Scikit-HEP developer pages.
Azure has pretty good documentation, but it doesn’t have a great intro and can be a little too focused on the GUI way to do things. I will focus on the YAML configuration files, and mention when you have to do things in the GUI.
Definitions
Azure has several terms that I am using in this post and others; here are some definitions.
- Project: A collection of pipelines.
- Pipeline: A plan to run CI on something. Could run tests, build binaries, etc.
- Trigger: This tells a pipeline when to run, such as on all new commits, on tags, on PRs, etc. Pipelines can also be triggered by the GUI.
- Job: A collection of work that runs on an Agent.
- Agent: A virtual machine that runs your jobs. Microsoft hosted agents are used in the official service, and come in all three major operating systems.
- Condition: Tells a job or a step to run or be skipped based on logic.
- Steps: The small sequential units of work that jobs run.
- Task: The work that a step runs.
- Artifact: A saved collection of files you can download or publish later.
- Release Pipeline: A separate, currently GUI-only set of pipelines for releasing builds.
- Variable: An item, set in either the YAML or the GUI that can be used in
your pipelines with
$()most places. Non-secret variables also show up as environment variables.
GUI preparation
To set up a project, go to Azure DevOps and set up a project. You can have one project for each repository you are working on, or you can have one project for all your related repositories - it turns out “pipelines” are connected to GitHub repositories, rather than projects. Don’t worry, you can have multiple pipelines for one repository if you wish.
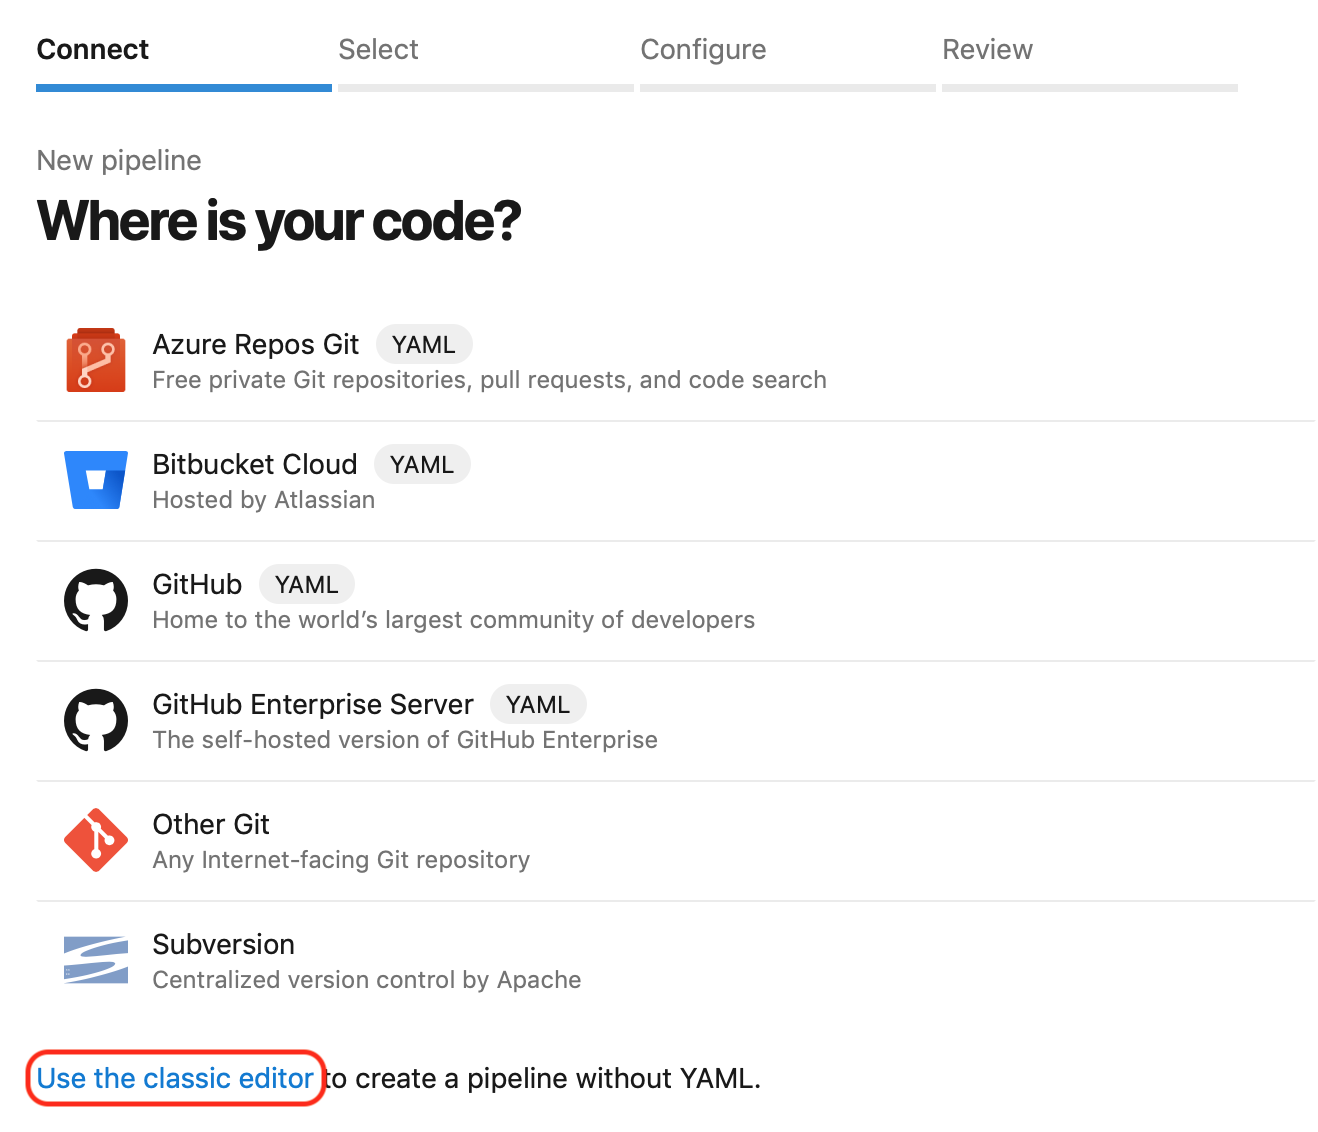
You will probably start with a default YAML powered pipeline. They have some templates if you would like one; for this tutorial you can assume you don’t need one unless you want to see what the default ones look like. Note: if you want to change the name of the YAML file that you read your pipeline from, you have to select Use the classic editor to create a pipeline without YAML to get that option, quite counterintuitively.
You can set everything up from the GUI, and even avoid committing anything into your repository (the DevOps project you have created is a sort of git repository of its own). You can store your YAML file in DevOps if you don’t want users to see it; I recommend placing it in your repository, though.
Setting up
You should have a configuration file, called azure-pipelines.yml by default,
in your repository (Azure will ask if it can commit a template one for you if
you pick that option). If you want multiple pipelines; for example a fast one
for testing and a slow one for building release binaries, you can change the
name of the file later.
Triggers
Let’s start with the first thing you will want to add: Triggers. This tells the pipeline when to run. You can have a branch here, or a rule.
trigger:
  - master
You can also trigger explicitly on tags, for example:
trigger:
  tags:
    include:
      - v*
You get PRs by default; that is, CI will build on all PRs. You can limit or turn
PRs off if you want (for example, if this is a build pipeline that makes
binaries). none is used to turn off an option. The following line will only
build on PRs targeting master:
pr:
  - master
Variables
You can set global variables. I like to keep the package name generic when I build a Python package so that the other lines remain generic, for example:
variables:
  package_name: my_package
You can also set variables in a few other places. The GUI has a place to add variables as well, including secret variables.
In any of your YAML files, if you write $(package_name), the variable will be
substituted in before the line is passed on to wherever it is going. This
allows you to write the same syntax even if you are using a variable in
different shells, or if you are using the variable in a non-shell portion of the
YAML.
Jobs
Jobs are next; they each have a pool: vmImage: option (ubuntu-16.04,
macos-10.14, or vs2017-win2016 are most common) and steps to perform. This
is a good place to introduce template files: you can take a series of steps and
put them in a file, and they can be injected using the template key. This allows
you to easily reuse the same steps in multiple places.
jobs:
  - job: "Linux"
    pool:
      vmImage: "ubuntu-16.04"
    steps:
      - template: .ci/azure-steps.yml
Unlike some older systems, jobs (as well as steps, as we will see soon) have user defined names, so they are easy to monitor and understand. You just can’t put spaces or other non-valid identifiers here. Like many areas, quotes are optional; this depends on the YAML syntax more than Azure.
Job Matrix
The matrix, so named from its traditional ability to parametrize on multiple things, is a powerful way to run in multiple configurations; since human readable names are important, I will only focus on depth-one matrices, which is really just a simple list. Here’s what it looks like:
strategy:
  matrix:
    MyName1:
      variable1: "1"
      variable2: "1"
    MyName2:
      variable1: "2"
      variable2: "2"
There’s really nothing special about matrices; they just are a list of names and some variables as mappings, and run once with each item in the matrix. (This is much simpler than some other implementations I have seen.) You use the standard variable substitution to do the rest. For example, to run on all three common operating systems, you could do:
- job: AllThree
  strategy:
    matrix:
      Windows:
        image: "vs2017-win2016"
      macOS:
        image: "macOS-10.14"
      Linux:
        image: "ubuntu-16.04"
  pool:
    vmImage: $(image)
This sets the same variable image for each of three matrix jobs named
Windows, macOS, and Linux, and then for each job the vmImage is filled
in with the value of the variable, $(image).
Steps
Each job does a series of steps. These are inside a “steps:” list, either
directly in your pipelines file or in a helper template file. There are several
possible step types:
Step: Script
The script step runs a command or series of commands in the native shell for
the system (cmd in Windows, bash otherwise). You can optionally add a
workingDirectory and a displayName - please always include a display name!
The multiline string syntax of YAML is very useful here:
- script: |
    python -m pytest --junitxml=junit/test-results.xml
  workingDirectory: tests
  displayName: "Test with pytest"
You can also use - bash:, which runs bash on any OS. These steps are really
just special cases of “Tasks”; if you were using the GUI, script and bash
would show up in the task library (under utilities).
Step: Tasks
There are lots of tasks in Azure that do something for you in a nice, prepackaged way. For example, you can send your tests results in JSON format to Azure, so it can provide the results directly in the UI:
- task: PublishTestResults@2
  inputs:
    testResultsFiles: "**/test-*.xml"
    testRunTitle: "Publish test results"
  condition: succeededOrFailed()
Tasks always have a version number (@2 in this case), so that Microsoft can
update a task without breaking older YAML files.
There are
lots of tasks.
Some examples are CMake@1, UsePythonVersion@0, and Docker@2. Tasks are
Open Source, as well.
Here I have also used a condition, which tells Azure when to run the step; we
usually want to publish failed results too, so the default condition
succeeded() was not good enough.
Step: PublishPipelineArtifact
One of the most useful tasks is the PublishPipelineArtifact, which will make
built files available in the GUI and/or later by Release Pipelines if you use
those.
steps:
  - task: PublishPipelineArtifact@0
    inputs:
      artifactName: "unique_name"
      targetPath: "dist"
The name here needs to be unique; you can use predefined variables like
$(Agent.OS) and $(Agent.JobName) to help build a unique name if you have
lots of jobs. You give it a target path, and it will make all files inside the
path available to download from the build. Files are deleted after a time or
number of new builds.
Step: Submodules
If you use git submodules and don’t want to configure the checkout from the GUI, you can use the following step:
steps:
  - checkout: self
    fetchDepth: 50
    submodules: true
I find this a little more elegant in the GUI, and it’s more of an implementation detail, so here’s how you would do it in the GUI.
- Click on your build pipeline, then click edit at the top right. If you have given Azure access to your GitHub repo, this is a “Azure aware” editor for YAML. We are going to keep going, though.

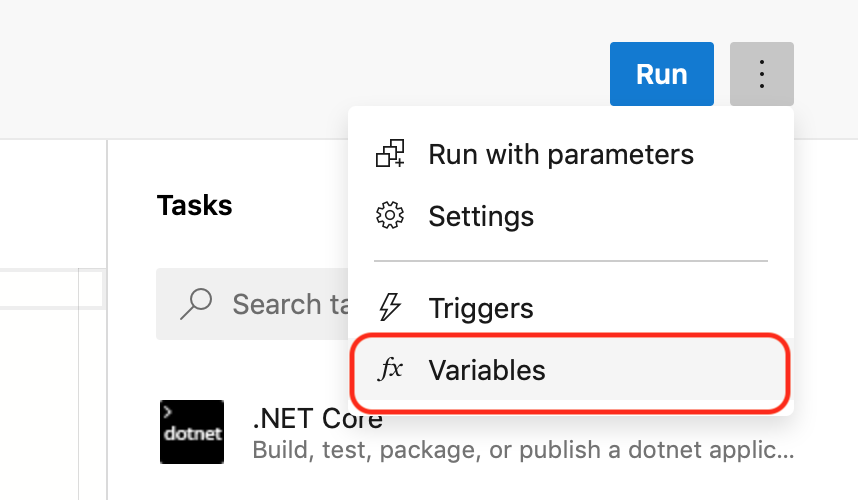
- Click on the details button (three vertical dots), then either of the two options at the bottom, such as variables.
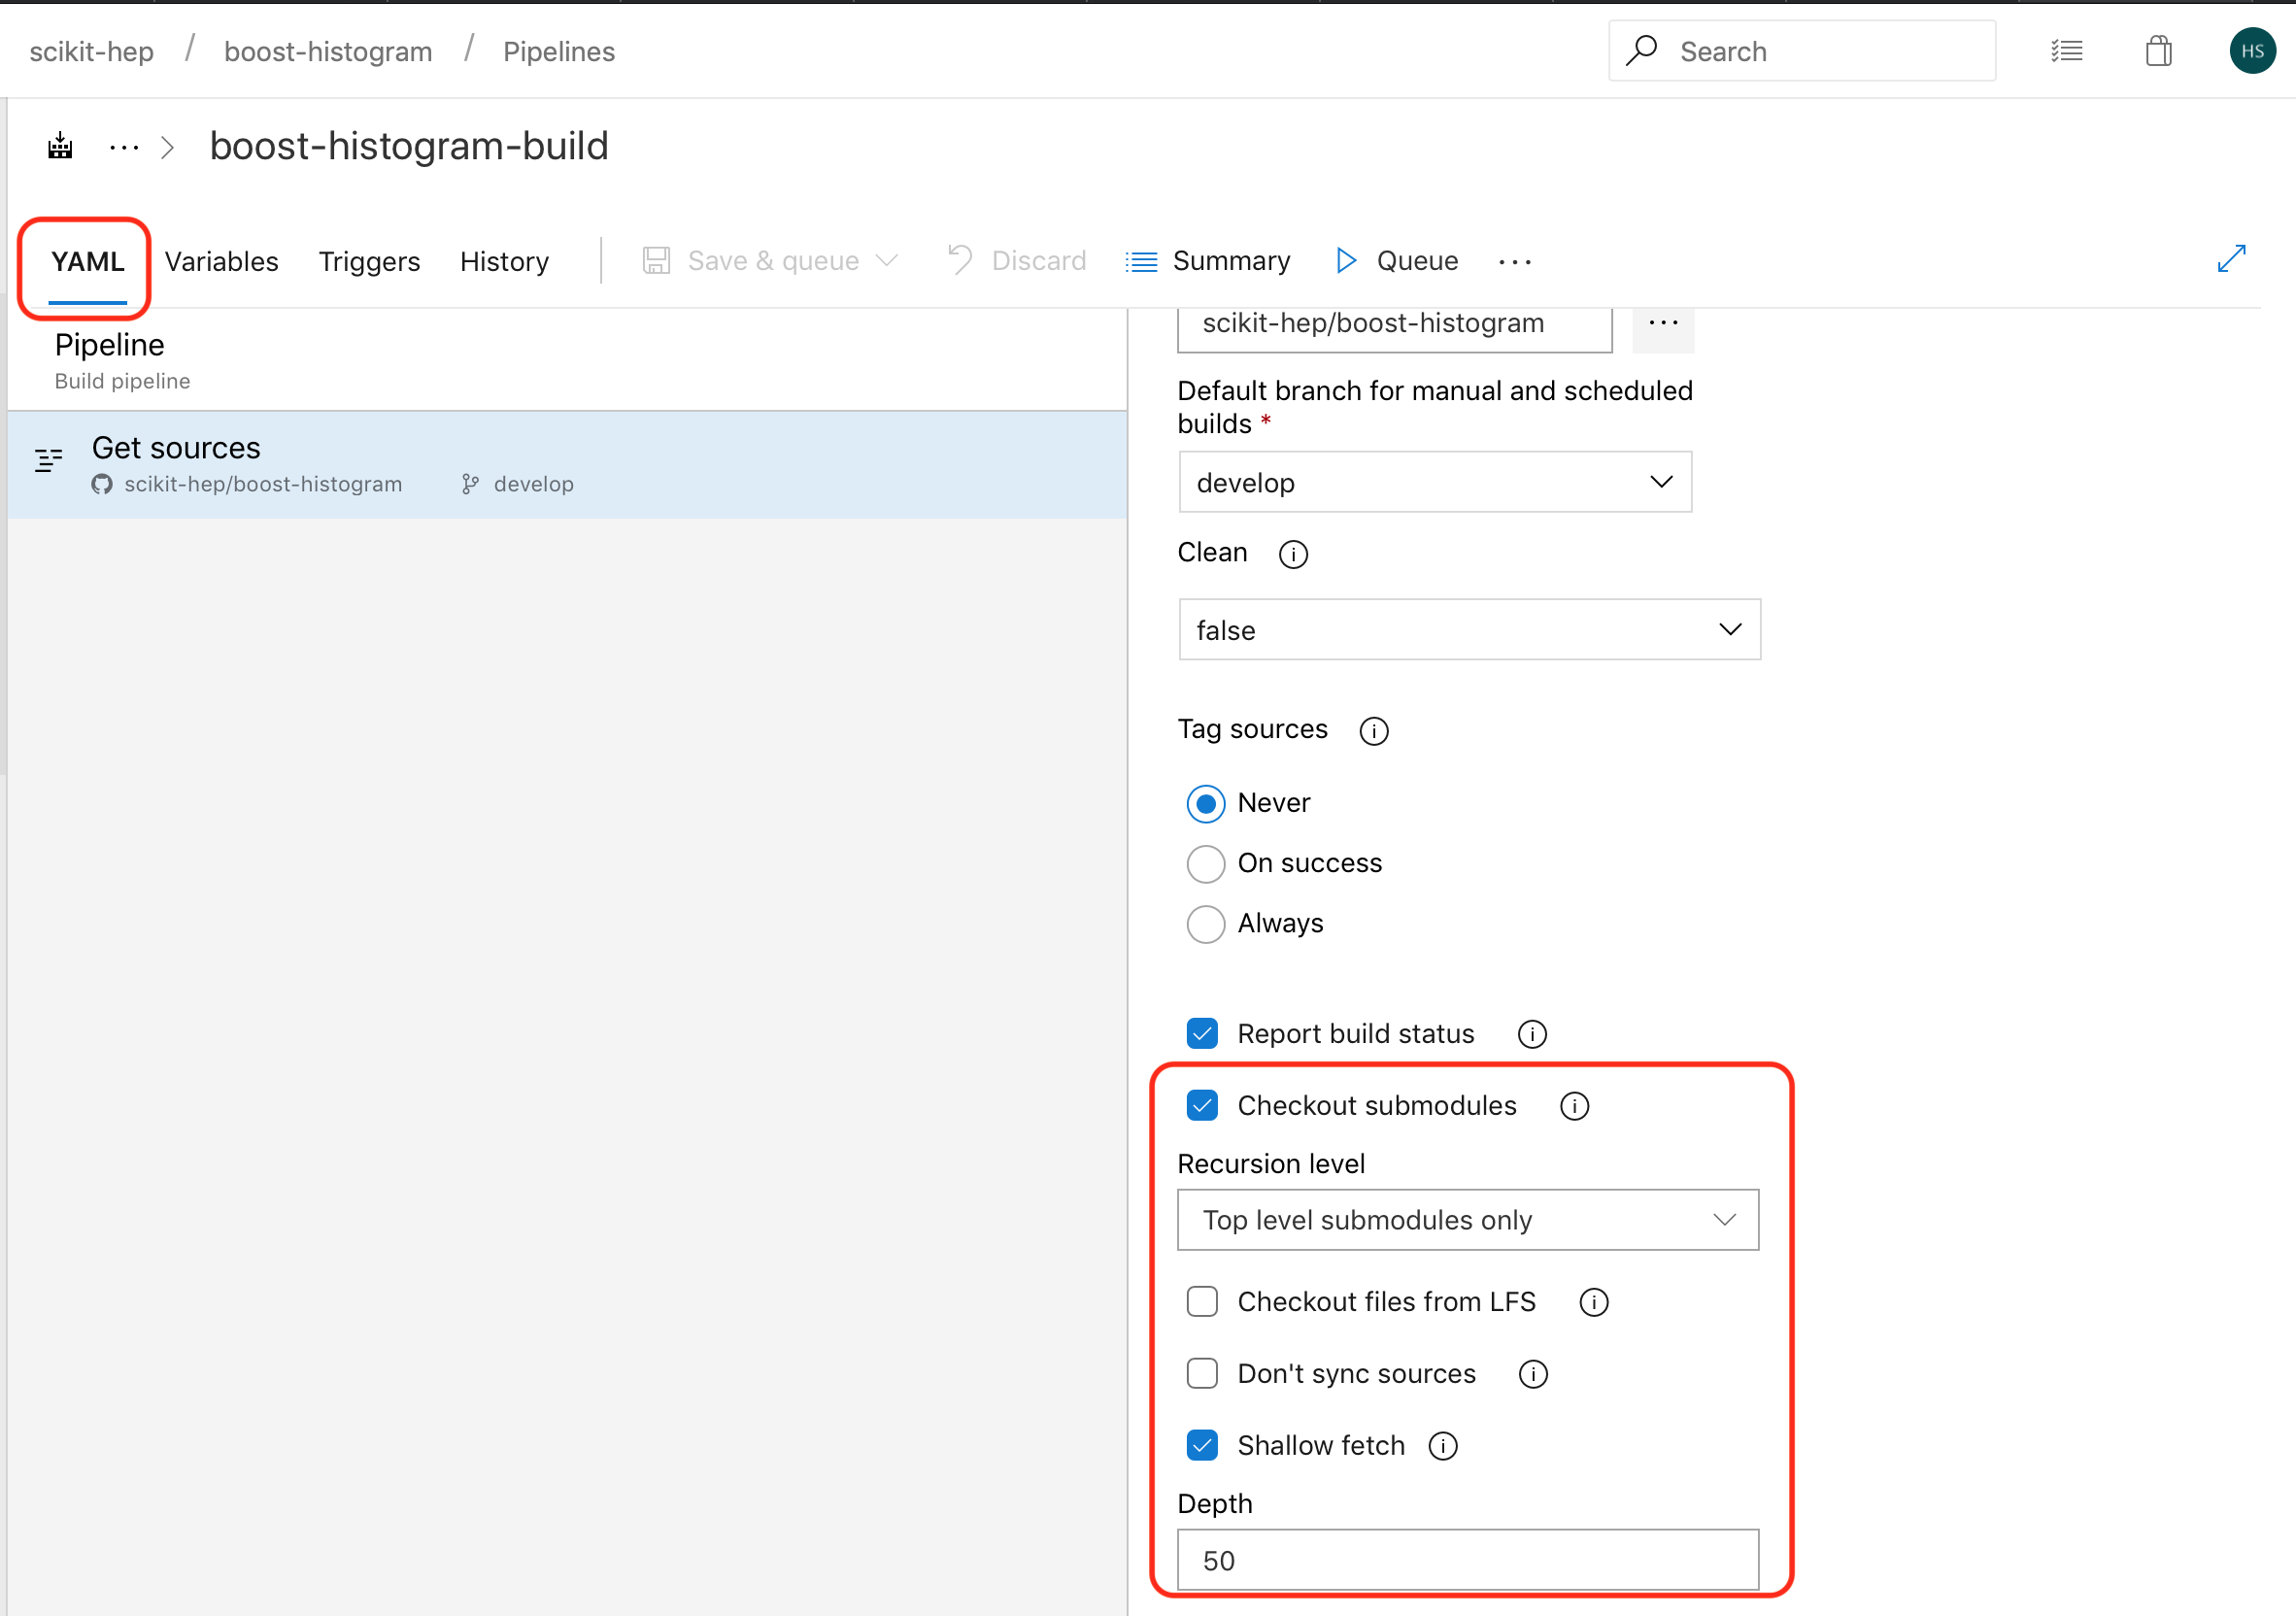
- Now click on the YAML tab, and finally you’ll have the option to change the source, including the checkout instruction. Enable submodules, and you can also reduce the checkout depth to 50 or so to speed up your checkout (CI does not need history, but GitHub isn’t setup to always provide depth 1 checkouts, so 50 is a common number here).
When you are done, click save, and you’ll be asked to provide a commit message - you are actually saving the configuration into the DevOps project repo (not your GitHub one).
Using Docker
You can use docker in several ways. You can just use docker directly from the command line if you like, as long as you are in an Agent that runs Docker (basically, Windows or Linux). I use this in the third entry in this DevOps series. There are also tasks to help with building docker containers.
You can run the entire job inside Docker. This requires that you have an image that does not have ENTRY_POINT set, and is slightly more finicky (IMO) than GitLab-CI, but still can be very useful. I will defer for the moment to the official docs for this, since they are quite good.
Wrap up
Now you have a basic idea of how to setup Azure. I will cover Release Pipelines in the next post, which are a fantastic way to take control of publishing build results, like Python wheels and source distributions. It gives you a level of control over the release process that most other systems do not have.
If you have suggestions or corrections, either let me know in the comments below, or open an issue here, since this is an open source blog. I would like to thank Eduardo Rodrigues, who helped me edit these posts before they were published.
The main contenders here are Travis (Linux & macOS), AppVeyor (Windows and now Linux), CircleCI (Linux & macOS), GitLab CI (Linux, more for self-hosted), and Jenkins (self-hosted only). ↩︎
Microsoft buys GitHub, Bash on Windows, OpenSSH on Windows, Windows calculator goes Open Source, Microsoft will ship a full Linux kernel in Windows 10, Microsoft announces Windows Terminal with open source code. ↩︎
NumPy, conda-forge, and many others. ↩︎